As electric vehicles (EVs) gain popularity worldwide, installing a home EV charger has become a practical choice for many owners. Home charging offers unmatched convenience, significant cost savings, and the ability to charge faster than standard outlets. Drawing from authoritative sources like Lectron EV, Pod Point, and HGTV, this guide covers charger types, selection criteria, installation steps, costs, incentives, and maintenance.
How to Install an Electric Vehicle Charger at Home
Why Install a Home EV Charger?
A home EV charger enhances the EV ownership experience by providing:
- Convenience: Charge overnight, ensuring your vehicle is ready each morning without visiting public charging stations.
- Cost Efficiency: Home charging is typically cheaper than public charging, especially when using off-peak electricity rates.
- Faster Charging: Level 2 chargers deliver 13-25 miles of range per hour, compared to 2-5 miles per hour with Level 1 chargers.
- Property Value: With EVs becoming more common, a home charger can increase your property’s appeal to future buyers.
According to J.D. Power, approximately 60% of EV owners using Level 1 chargers are considering upgrading to Level 2 for improved speed and convenience Lectron EV Guide. Over 95% of EV charging occurs at home, making a dedicated charger a worthwhile investment Smart Charge America.
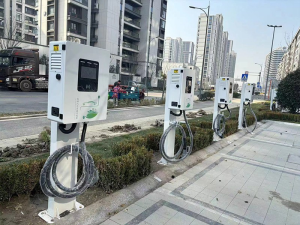
Types of EV Chargers
Home EV chargers are primarily categorized into two types:
| Type | Voltage | Charging Speed | Best Use Case |
|---|---|---|---|
| Level 1 | 120V | 2-5 miles of range per hour | Short commutes, temporary charging |
| Level 2 | 240V | 13-25 miles of range per hour (up to 60 miles for high-end models) | Daily home charging |
- Level 1 Chargers: Use standard 120V household outlets, requiring 12-24 hours to fully charge an EV. Most EVs include a Level 1 charger, suitable for light use.
- Level 2 Chargers: Require a 240V circuit, charging an EV in 4-8 hours. These are ideal for regular use due to their speed and efficiency.
Level 2 chargers are the preferred choice for home installations due to their practicality for daily driving needs.
Selecting the Right EV Charger
When choosing a Level 2 charger, consider the following factors:
- Charging Speed: Power outputs range from 3.3kW to 19.2kW. A 7kW charger is sufficient for most users, providing 13-25 miles of range per hour.
- Compatibility: Ensure the charger supports your EV’s charging port, such as J1772 (most brands), CCS, CHAdeMO, or Tesla’s NACS.
- Smart Features: Wi-Fi-enabled chargers allow remote monitoring, scheduling for off-peak rates, and energy usage tracking via smartphone apps.
- Cable Length: A minimum of 20 feet is recommended for parking flexibility.
- Safety Certifications: Choose chargers certified by UL or ETL for safety and reliability.
- Brand and Warranty: Opt for reputable brands with strong customer support and warranties.
Recommended Chargers
| Brand | Model | Power | Price (USD) | Features |
|---|---|---|---|---|
| ChargePoint | Home Flex | 9.6kW | ~$749 | Wi-Fi, adjustable power, universal |
| Tesla | Wall Connector | 11.5kW | ~$500 | Optimized for Tesla, high performance |
| Lectron | V-Box Pro | 11.5kW | ~$600 | Wi-Fi, cost-effective, J1772 compatible |
Assessing Your Home’s Electrical System
Before installing a Level 2 charger, verify that your home’s electrical system can support a 240V circuit:
- Check Electrical Panel: Ensure there is sufficient capacity and space for a 40-50 amp dedicated circuit. Most Level 2 chargers require this.
- Consult a Licensed Electrician: A professional can assess your panel and determine if upgrades are needed, such as adding a new circuit or replacing the panel.
- Evaluate Household Load: Confirm that the charger won’t overload your system when other high-power appliances (e.g., air conditioners) are in use.
If your home lacks a 240V circuit or has limited panel capacity, you may need:
- New Circuit Installation: Adding a 240V circuit to support the charger.
- Panel Upgrade: Replacing an outdated or undersized panel.
- Service Upgrade: In rare cases, increasing your home’s electrical service capacity through your utility provider.
Navigating Permits and Regulations
Local regulations vary by region and may require permits for EV charger installation:
- United States: Many municipalities require electrical permits, often included in installation costs HGTV Guide.
- United Kingdom: Installations must comply with BS7671 electrical standards, and renters may need landlord approval Pod Point Guide.
- copyright: Provinces like British Columbia enforce specific electrical codes, and permits may be required.
- Other Regions: In countries like China, installations may need utility company approval, especially in apartments.
Contact your local building department or electrician to confirm requirements. For renters or apartment dwellers, obtain permission from landlords or property managers, potentially using resources like Pod Point’s template letter Pod Point Resident Letter.
Installation Process
Installing a Level 2 EV charger involves the following steps:
- Select Installation Location:
- Choose a spot near your parking area and electrical panel to minimize wiring costs.
- Ensure accessibility and safety; outdoor installations require weatherproof chargers.
- Prepare Materials:
- Gather the charger, 240V outlet or hardwiring components, appropriate gauge wiring (e.g., 6 AWG for 48A), and mounting hardware.
- Hire a Licensed Electrician:
- A professional will handle wiring, grounding, and compliance with electrical codes.
- Hardwired installations require expertise, while plug-in models may allow DIY if a 240V outlet exists.
- Obtain Permits:
- Submit applications to local authorities as needed, often facilitated by your electrician.
- Mount and Wire the Charger:
- Securely mount the charger to a wall stud or suitable surface.
- Run wiring from the panel to the charger, using conduit for protection if needed.
- Install a double-pole breaker (40-50 amps) in the panel and connect the wiring.
- Test the Charger:
- Verify functionality by charging your EV, checking for proper power delivery and no faults.
Safety Considerations
- Disconnect power during installation to prevent electrical hazards.
- Ensure proper grounding to avoid shocks or equipment damage.
- Follow manufacturer instructions to maintain warranty validity.
DIY vs. Professional Installation
Level 1 chargers can be plugged into standard outlets, making them suitable for DIY. However, Level 2 chargers, especially hardwired models, require professional installation due to high-voltage wiring and safety concerns Qmerit Guide. Hiring a licensed electrician ensures compliance with codes and protects your home, vehicle, and insurance coverage.
Cost Breakdown
The total cost of installing a home EV charger varies based on equipment, labor, and electrical upgrades:
| Item | Cost Range (USD) | Description |
|---|---|---|
| Charger Equipment | $300-$2,000 | Depends on brand, power, and smart features |
| Installation Labor | $500-$3,000 | Includes electrician fees, wiring, permits |
| Electrical Upgrades | $2,000-$8,000 | For panel upgrades or new circuits |
Incentives and Rebates
Many regions offer financial incentives to offset costs:
- United States: Federal tax credit up to $1,000; additional state and utility rebates may apply Qmerit Incentives Guide.
- United Kingdom: OZEV grant provides up to £350 for renters or flat dwellers Pod Point OZEV Guide.
- copyright: British Columbia offers up to $350 for charger installations, with extra rebates for smart chargers.
- Other Regions: Countries like Germany, France, and China provide subsidies or tax breaks for EV infrastructure.
Check with local utilities or government energy departments for available programs.
Maintenance and Troubleshooting
Routine Maintenance
- Cleaning: Wipe the charger and cable regularly to remove dust and debris.
- Inspection: Check cables and connectors for wear or damage every six months.
- Software Updates: Update smart charger firmware to maintain performance and security.
Common Issues and Solutions
| Issue | Possible Cause | Solution |
|---|---|---|
| Charger not working | Power supply issue | Check breaker or outlet |
| Slow charging | Damaged cable or low power | Replace cable or consult electrician |
| App connectivity issue | Network problem | Restart router or update app |
For persistent issues, contact the charger manufacturer or a professional electrician. Regular maintenance extends the charger’s lifespan and ensures reliable performance Cyberswitching Guide.
Conclusion
Installing an EV charger at home is a smart investment that enhances convenience, reduces charging costs, and supports the growing adoption of electric vehicles. By selecting the right charger, assessing your electrical system, hiring a professional electrician, and leveraging available incentives, you can achieve a safe and efficient home charging setup. Contact a licensed electrician or check local incentive programs to get started today.
Frequently Asked Questions
- Can I install a Level 2 charger myself?
Plug-in models may be DIY if a 240V outlet exists, but hardwired installations require a licensed electrician for safety and compliance. - Do I need a permit to install an EV charger?
Requirements vary by region; many areas require electrical permits. Consult your local building department or electrician. - How much does it cost to install a home EV charger?
Total costs range from $800-$5,000, depending on the charger, installation complexity, and electrical upgrades. - Are there incentives for installing an EV charger?
Yes, many regions offer rebates or tax credits, such as $1,000 in the U.S. or £350 in the UK. Check local programs. - What’s the difference between Level 1 and Level 2 chargers?
Level 1 uses 120V outlets (2-5 miles/hour); Level 2 uses 240V circuits (13-25 miles/hour), offering faster charging.
Comments on “How to Install an EV Charger at Home”